EN
EN


Selecting and Sizing the Right Patient Gait Belt
Measuring the patient for accurate gait belt sizing
Begin by measuring the patient's waist at its widest point, typically just above the hips, using a flexible tape measure. Record the measurement in inches or centimeters, then add 4–6 inches (10–15 cm) to allow for secure fastening and caregiver grip. Three key factors guide proper selection:
- Body weight: Ensures the belt material can safely support the patient's mass
- Mobility level: Determines the need for additional grip points or handle placement
- Skin integrity: Influences padding requirements to reduce pressure injury risk
Use the following sizing guidelines to match the patient's measurements with appropriate belt specifications:
| Belt Length (inches) | Waist Range (inches) | Weight Capacity (lbs) | Patient Profile |
|---|---|---|---|
| 54–60 | 28–49 | 300 | Standard adult |
| 70–74 | 45–69 | 500 | Bariatric/plus-size |
Matching belt type—standard, wide, or bariatric—to patient needs
The selection of belt type should really come down to what the patient needs clinically instead of just going with whatever's easiest to grab. Most folks who can move around on their own but need a little help will do fine with the regular 2 inch wide belt. When dealing with patients who have sensitive skin issues or need longer periods of support though, switching to a wider 4 inch belt makes all the difference in spreading out the pressure across the body. And let's talk about bariatric belts for a second these are specially made with extra strong stitching, heavier duty buckles that won't snap under stress, and they're built to handle weights well beyond 300 pounds making them essential for certain larger patients where safety is absolutely critical.
Before use, always verify that:
- The buckle is positioned away from the spine to avoid discomfort
- Padding covers bony prominences to protect skin integrity
- The quick-release mechanism functions smoothly
Avoid gait belt use in cases of abdominal wounds, recent abdominal surgery, or conditions like severe osteoporosis and rib fractures, where circumferential pressure could cause harm.
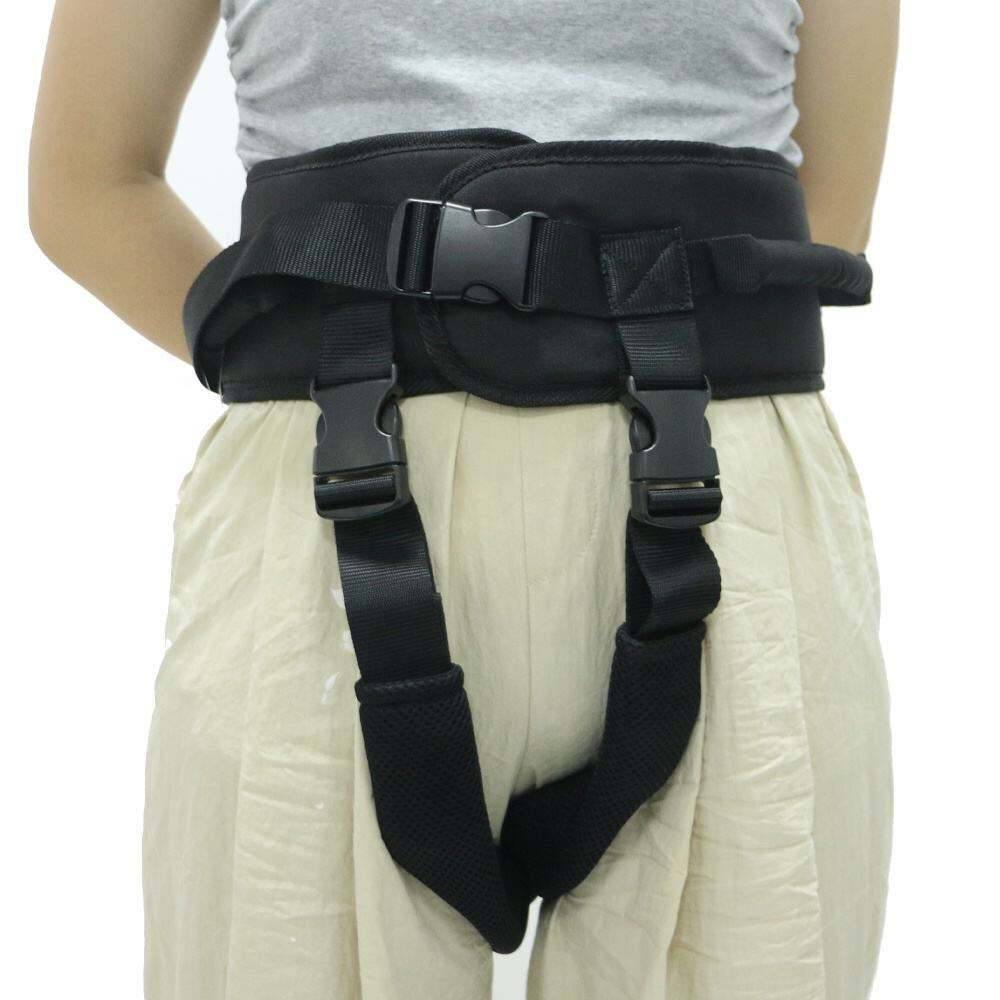
Correct Placement and Initial Adjustment of the Patient Gait Belt
Anatomical landmarks for secure, non-restrictive placement
The gait belt should be placed across the lower part of the stomach area and just above the hips, making sure it lines up with those bony parts at the top of each hip (called iliac crests). Putting it there gives the best support without increasing the chance someone might fall. Don't put the belt anywhere near the ribs, breasts, soft belly folds, or any areas where there's been surgery done previously. When working with older adults or people who are weak and have fragile skin, getting the positioning right makes a real difference. Research from the Journal of Wound Care shows that proper placement can cut down on pressure injuries by around 27 percent for these vulnerable individuals.
Step-by-step adjustment: Tightness, alignment, and buckle positioning
Follow these evidence-based steps to ensure safe and effective use:
-
Tightness:
- Fasten the belt snugly, allowing space for two fingers between the belt and patient's torso
- This prevents slippage without restricting respiration or circulation
-
Alignment:
- Ensure the belt sits horizontally level around the waist
- Check for twisting before initiating any transfer
-
Buckle positioning:
- Place the buckle to the side or front, never over the spine or bony areas
- Tuck in excess strap length to eliminate tripping hazards
Reassess fit after the patient stands, as muscle engagement may loosen the belt. Proper adjustment reduces caregiver injury rates by 19% during mobility tasks. Never apply the belt over colostomy bags, unstable fractures, or sensitive medical devices.
Using the Patient Gait Belt Safely During Transfers and Mobility Assistance
Evidence-based transfer techniques that maximize belt effectiveness
Proper technique reduces lumbar strain on caregivers by up to 40% (NCBI Study 2024). When assisting with a gait belt:
- Stand close to the patient with feet shoulder-width apart, knees bent, and back straight
- Grip the belt handles firmly, keeping elbows close to your body
- Use clear verbal cues such as "Ready? Stand on three: 1–2–3" to coordinate movement
- Initiate motion with your legs, not your back, and maintain the patient's natural spinal alignment
For seated-to-standing transfers, pivot the patient's legs off the bed first, then assist with standing. These techniques are proven to reduce injury risks for both patients and caregivers during activities of daily living (ADLs).
When to avoid or discontinue use: Contraindications and red flags
Discontinue gait belt use immediately if:
- Abdominal wounds, recent surgery, or implanted medical devices are present
- The patient reports pain, dizziness, or shortness of breath
- There is poor trunk control or inability to bear weight
Absolute contraindications include severe osteoporosis, rib fractures, and high-risk pregnancies. Red flags such as skin irritation, breathing restriction, or belt slippage during movement require immediate reassessment. In these cases, switch to alternative mobility aids like stand-assist lifts to ensure safety.
Ongoing Fit Assessment and Patient-Centered Adjustments
Regular reassessment of gait belt fit is critical, as patient conditions can change due to weight fluctuations, muscle atrophy, or edema. Conduct fit evaluations at least monthly—or more frequently with clinical changes. Improperly adjusted mobility aids contribute to 23% of caregiver-assisted fall incidents (Rehabilitation Safety Review 2023).
Getting regular input from patients about where they feel discomfort matters a lot, particularly around areas like the ribs and hips. If someone can slip more than two fingers under the strap or shows signs of red skin after wearing it, then the tightness probably needs tweaking. Keep track of these changes in their medical notes so we can see how things develop over time and adjust our care strategy accordingly. Taking this kind of hands-on approach not only keeps everyone safer but also respects what patients want and helps them stay mobile for longer periods.
FAQ
What is a gait belt used for?
A gait belt is used to safely assist with the transfer or ambulation of patients who have mobility challenges, ensuring secure grip for caregivers while minimizing the risk of injury.
How do I know which gait belt size is appropriate?
Measure the patient's waist at its widest point and add 4–6 inches for secure fastening. Consider factors like body weight, mobility level, and skin integrity for selecting belt size and type.
When should a gait belt not be used?
Avoid using a gait belt if the patient has abdominal wounds, recent surgeries, severe osteoporosis, rib fractures, or high-risk pregnancies, where circumferential pressure could cause harm.